Hello World - First Integration

Why This Blog
I had an interaction with an Intern recently. She was trained in OIC by a Professional Trainer but was overwhelmed with so many concepts. She wished someone would start with the very basics and help them understand the concepts in short chunks. That is when I thought I should write this blog.
Whenever someone starts learning a new programming language or a new tool, the first thing they do is write a 'Hello World' program. It’s a rite of passage for every developer. Even though Oracle Integration Cloud (OIC) is a low-code, visual-based tool, we are going to follow that same tradition. We will start by building our own 'Hello World' integration to get comfortable with the platform and kick-start our journey.
Step 1: Create a REST TRIGGER Connection
We create a Trigger connection when we want to expose our Integration to get invoked by external applications. It can be in the form of Business Event to create any near real-time integration.
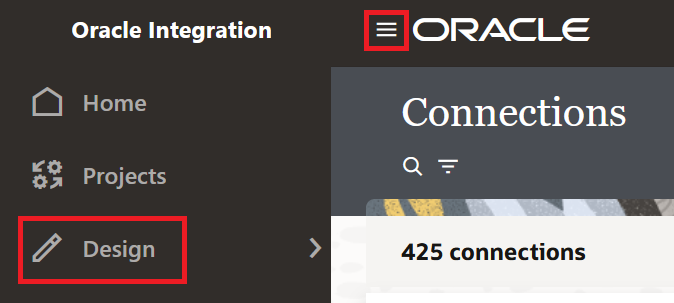
- Navigate to ☰ > Design
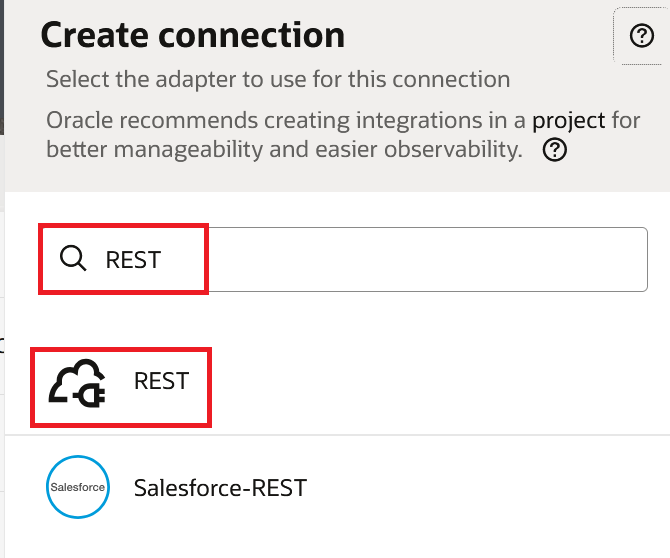
- Click on Connections > Create.

- Search for "REST" in the search box and click on the REST adapter from the results.
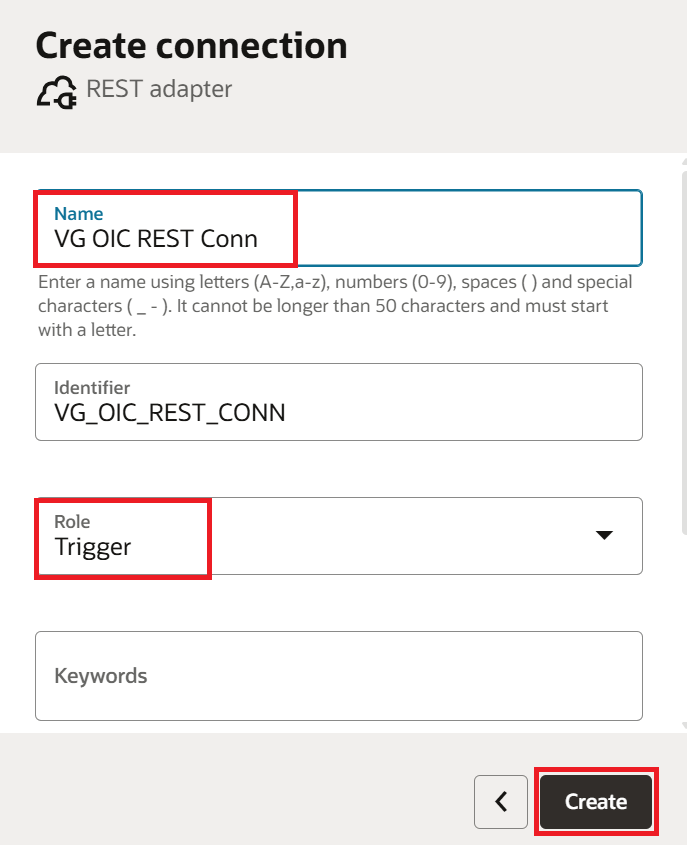
Enter the Name as "VG OIC REST Conn" (VG is my name prefix. You can use your own prefix) and select the Role as "Trigger". The Identifier is auto generated. Click Create. We select the role as Trigger only for a REST connection when we want to expose the integration as a REST service. If we needed to invoke an external REST API, we would select the Invoke role instead.
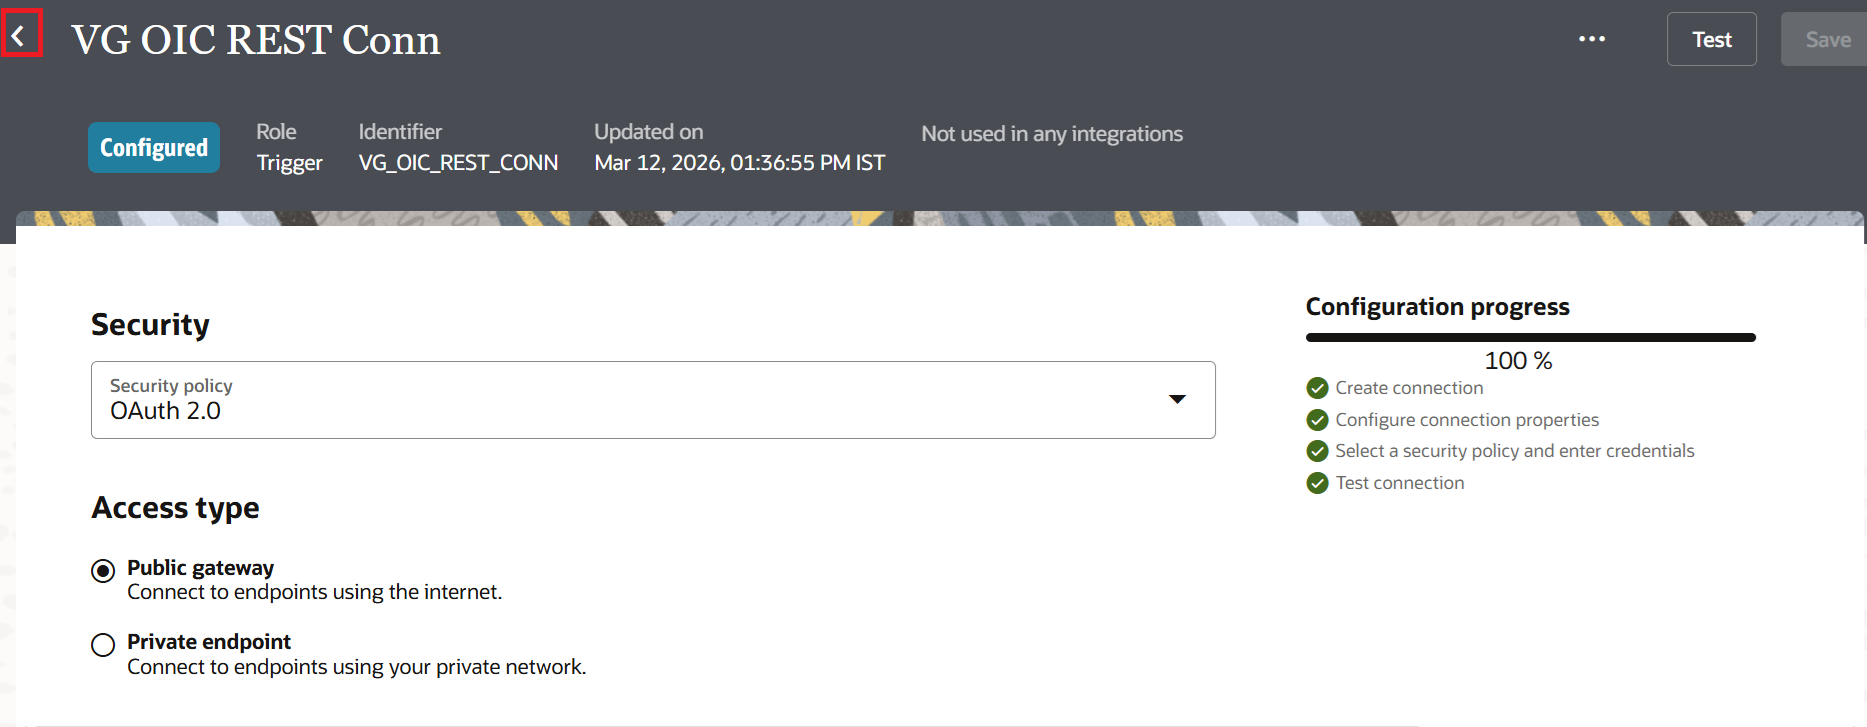
Keep the default configuration and click the Back icon at the top left. Since we are exposing our integration as a REST service, OIC gives us the option to choose the security policy for invoking that integration. The default is OAuth 2.0. If we select OAuth 2.0, we need to create an OAuth application in OCI for invoking OIC integrations.
Note: For a Trigger connection, there is no need to test the connection. The configuration progress reaches 100% as soon as we set the role.
The connection is now created. Let us proceed to create the integration.
Step 2: Creating the App Driven Orchestration Integration
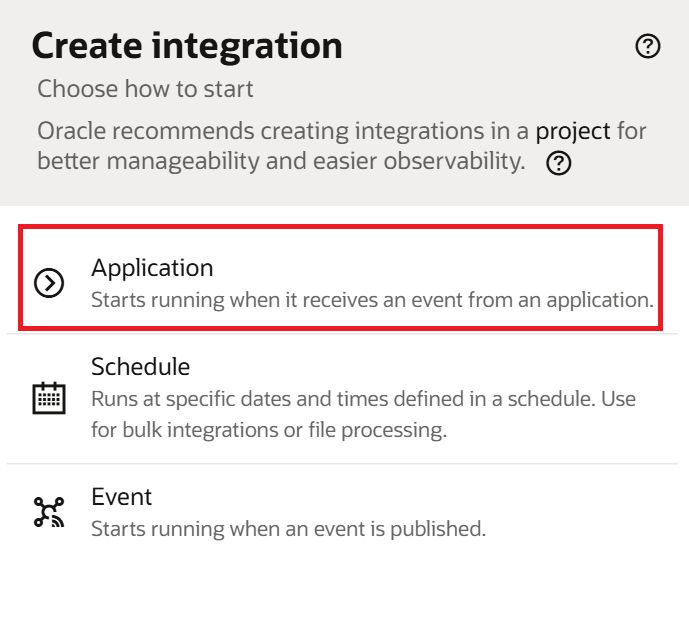
Navigate to ☰ > Design > Integrations > Create.

Click on "Application". We select Application because we want our integration to start when an external application sends a request. The Schedule option is for batch or time based processing. The Event option is for integrations triggered by a published business event:
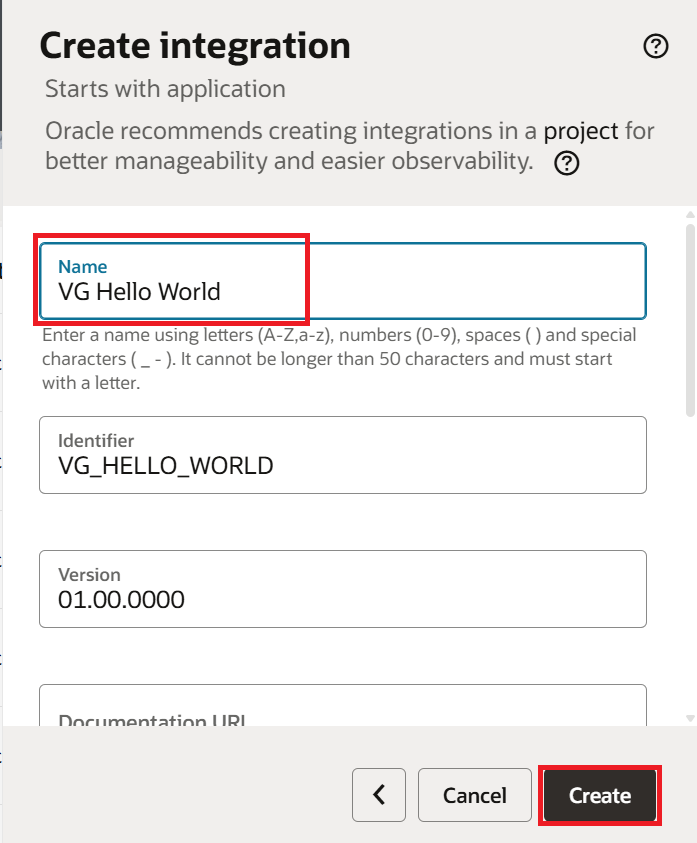
Enter the Name as "VG Hello World" and click Create:
The integration canvas opens up. We now need to configure the trigger, set up the endpoint, define request parameters, and specify the response format.
Step 3: Configuring the REST Trigger
On the integration canvas, click the + icon to add a trigger. Select "VG OIC REST Conn" from the list of available Trigger connections.

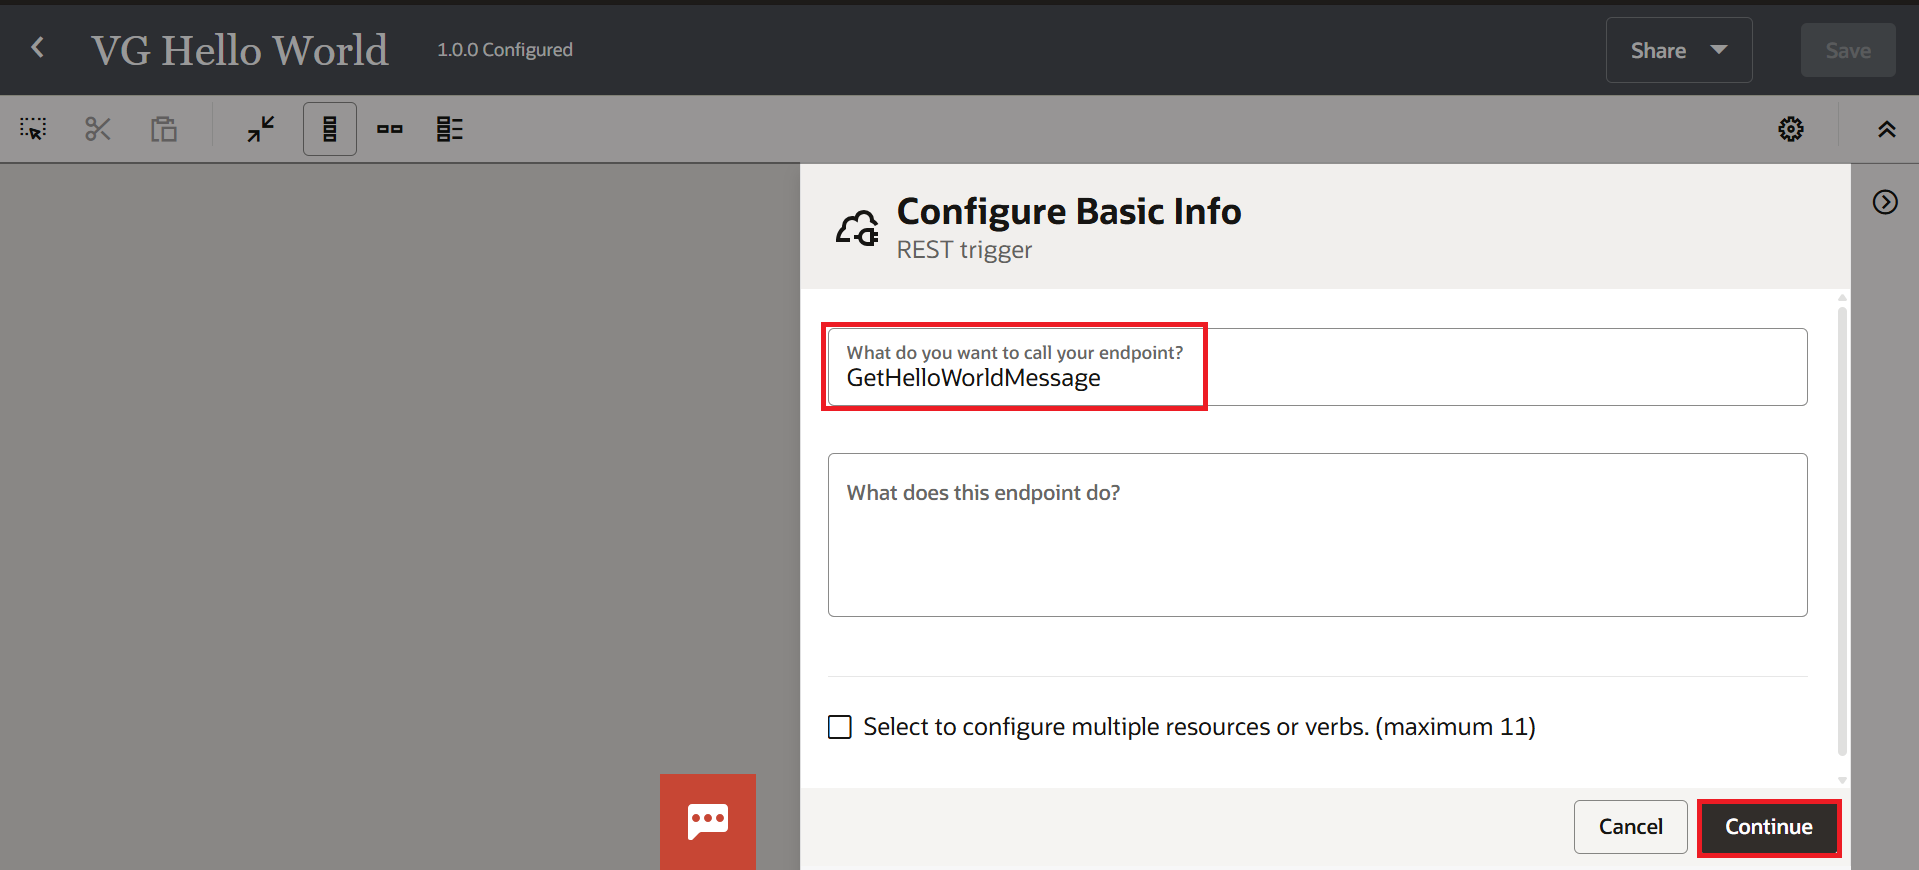
On the Configure Basic Info page, enter the endpoint name as "GetHelloWorldMessage" and click Continue.
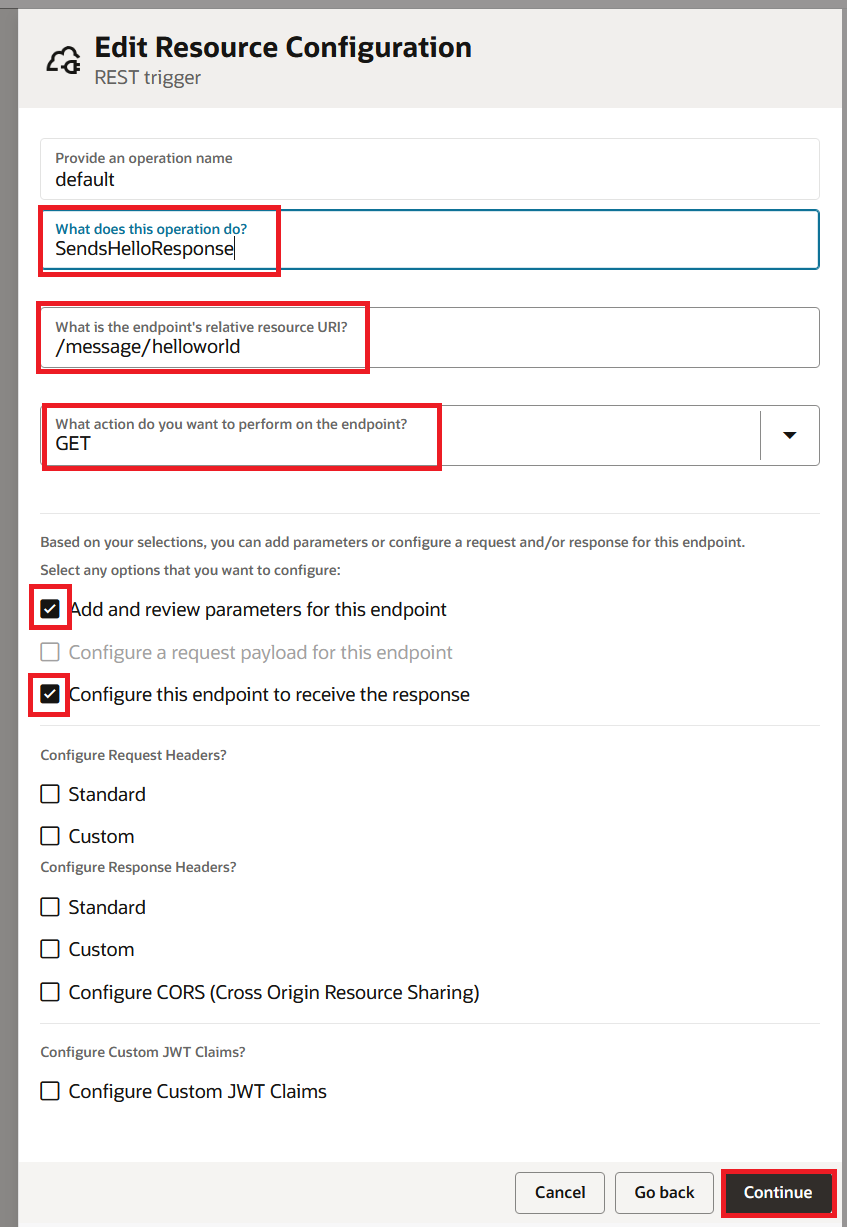
On the Edit Resource Configuration page, fill in the following details and click Continue:
- What does this operation do:
SendsHelloResponse - Relative resource URI:
/message/helloworld - Action:
GET - Check "Add and review parameters for this endpoint"
- Check "Configure this endpoint to receive the response"
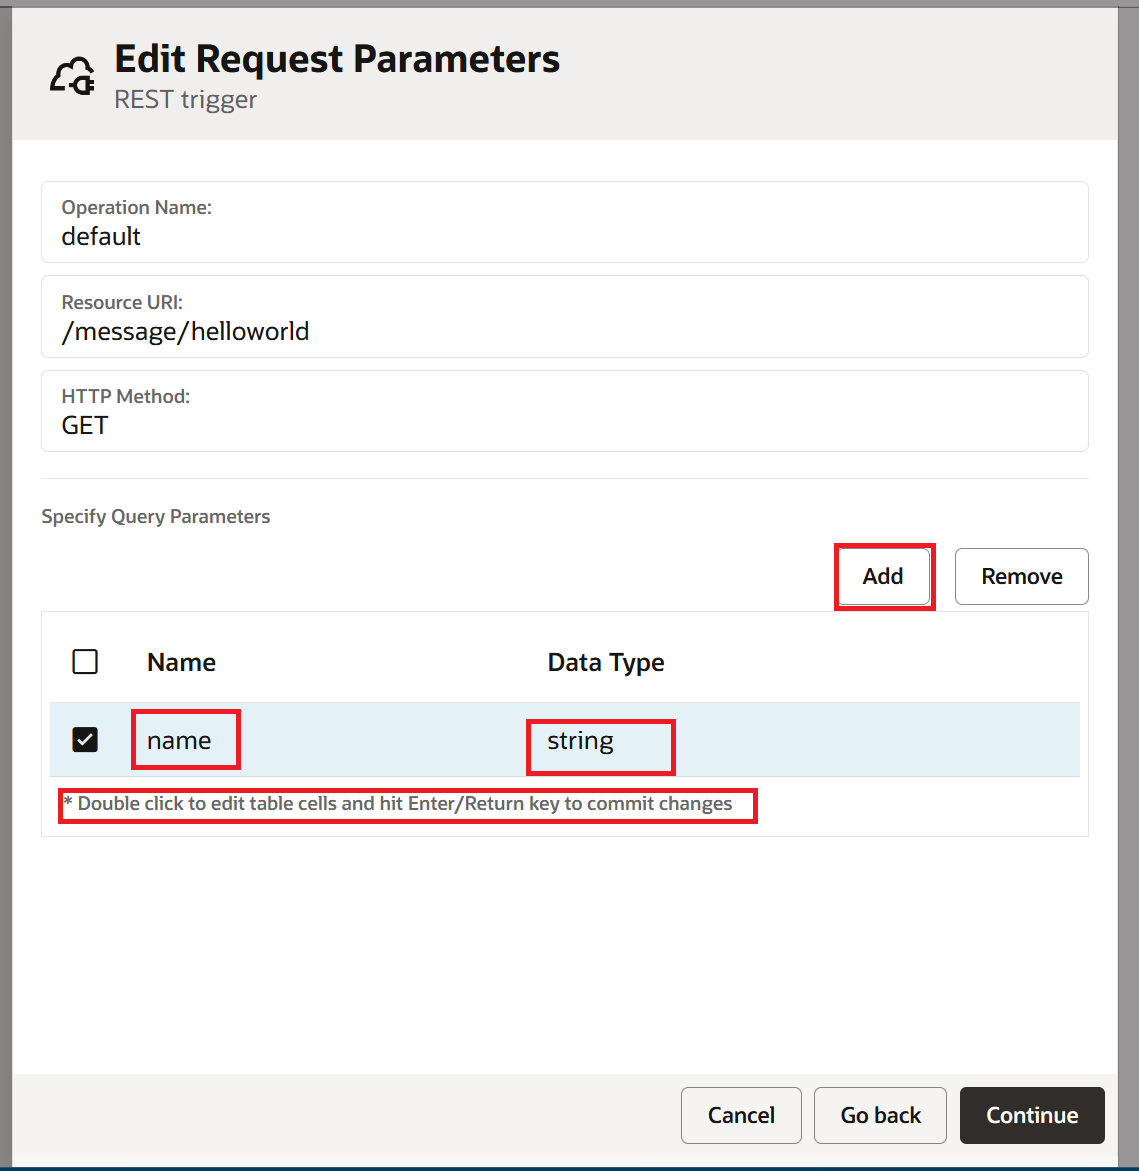
On the Edit Request Parameters page, click Add to add a query parameter. Set the Name as "name" and the Data Type as "string". Click Continue.
Note: Double click on the table cells to edit them. Hit Enter or Return to commit the changes.
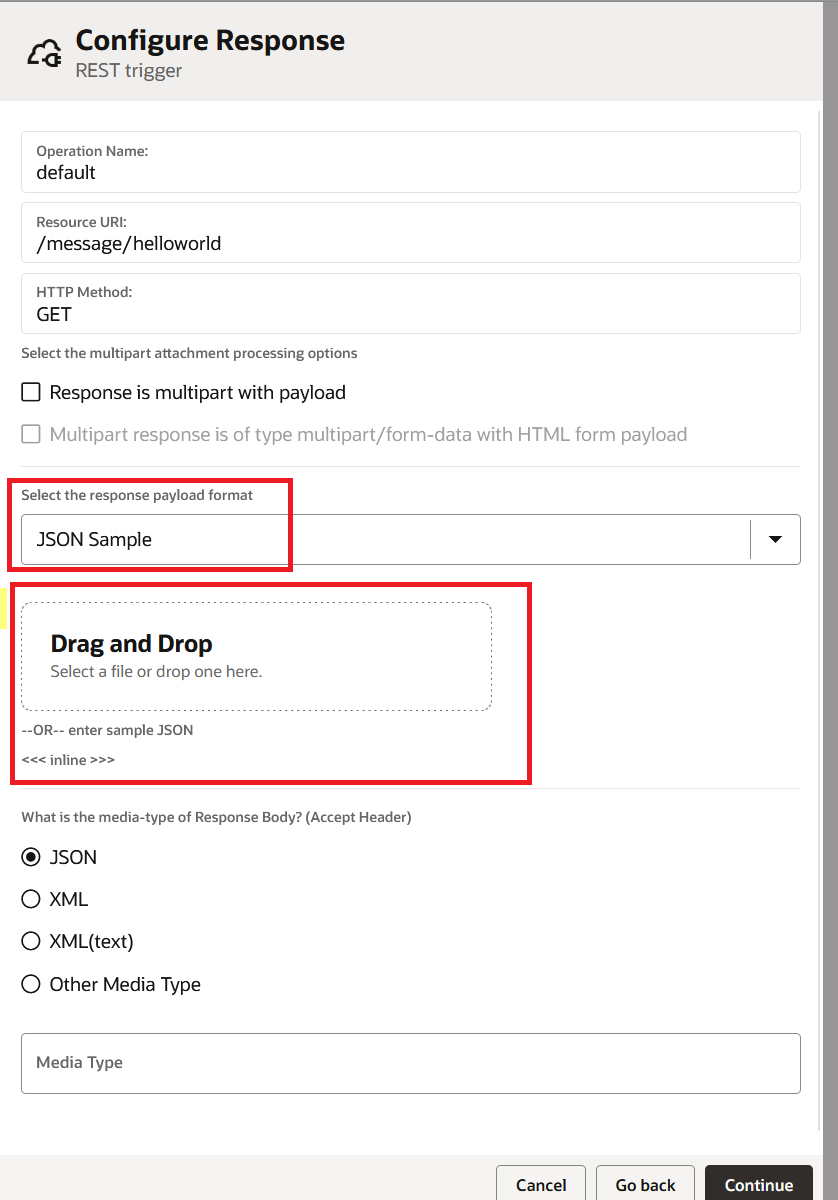
On the Configure Response page, select "JSON Sample" as the response payload format. Click on "<<< inline >>>" to enter a sample JSON.
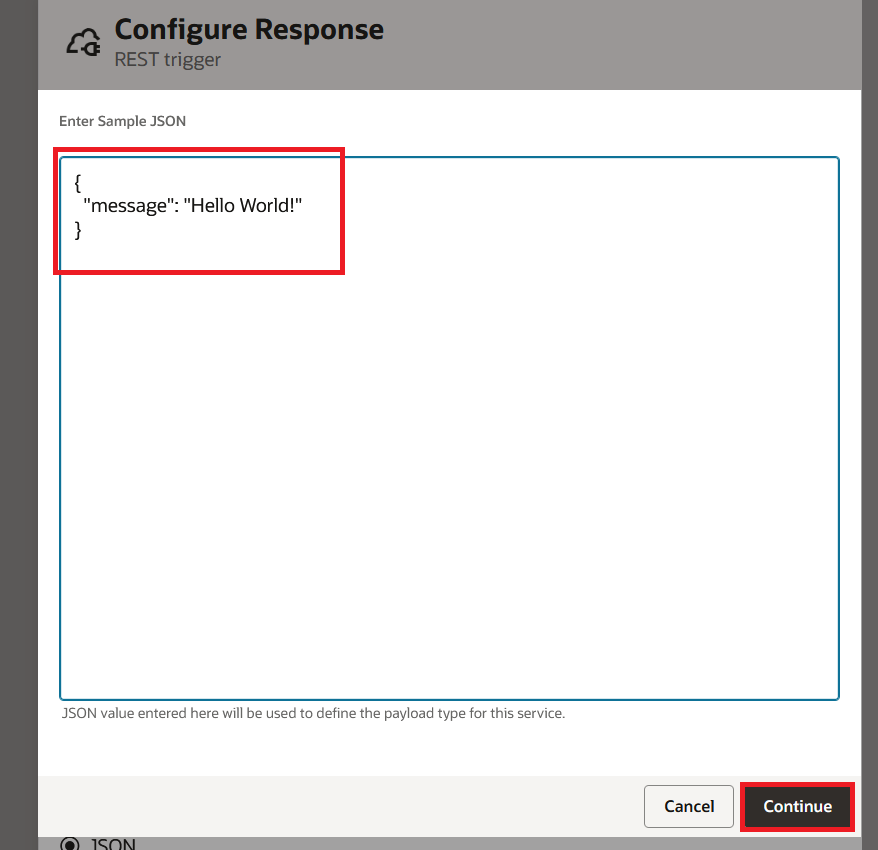
Enter the following sample JSON and click Continue:
{
  "message": "Hello World!"
}
Click Continue and then Finish to complete the trigger configuration.
Step 4: Configuring the Data Mapper
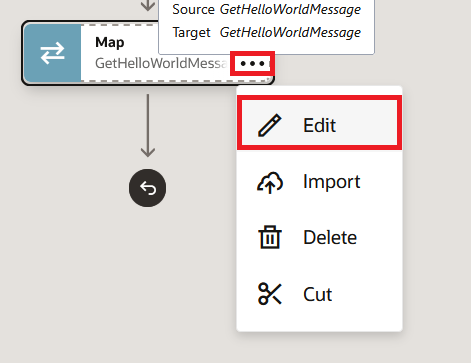
The integration canvas now shows the trigger and a Map action. We need to edit the Map to define how the response message is constructed.
Hover over the Map action to reveal the three dot menu. Click on the three dots and select Edit.
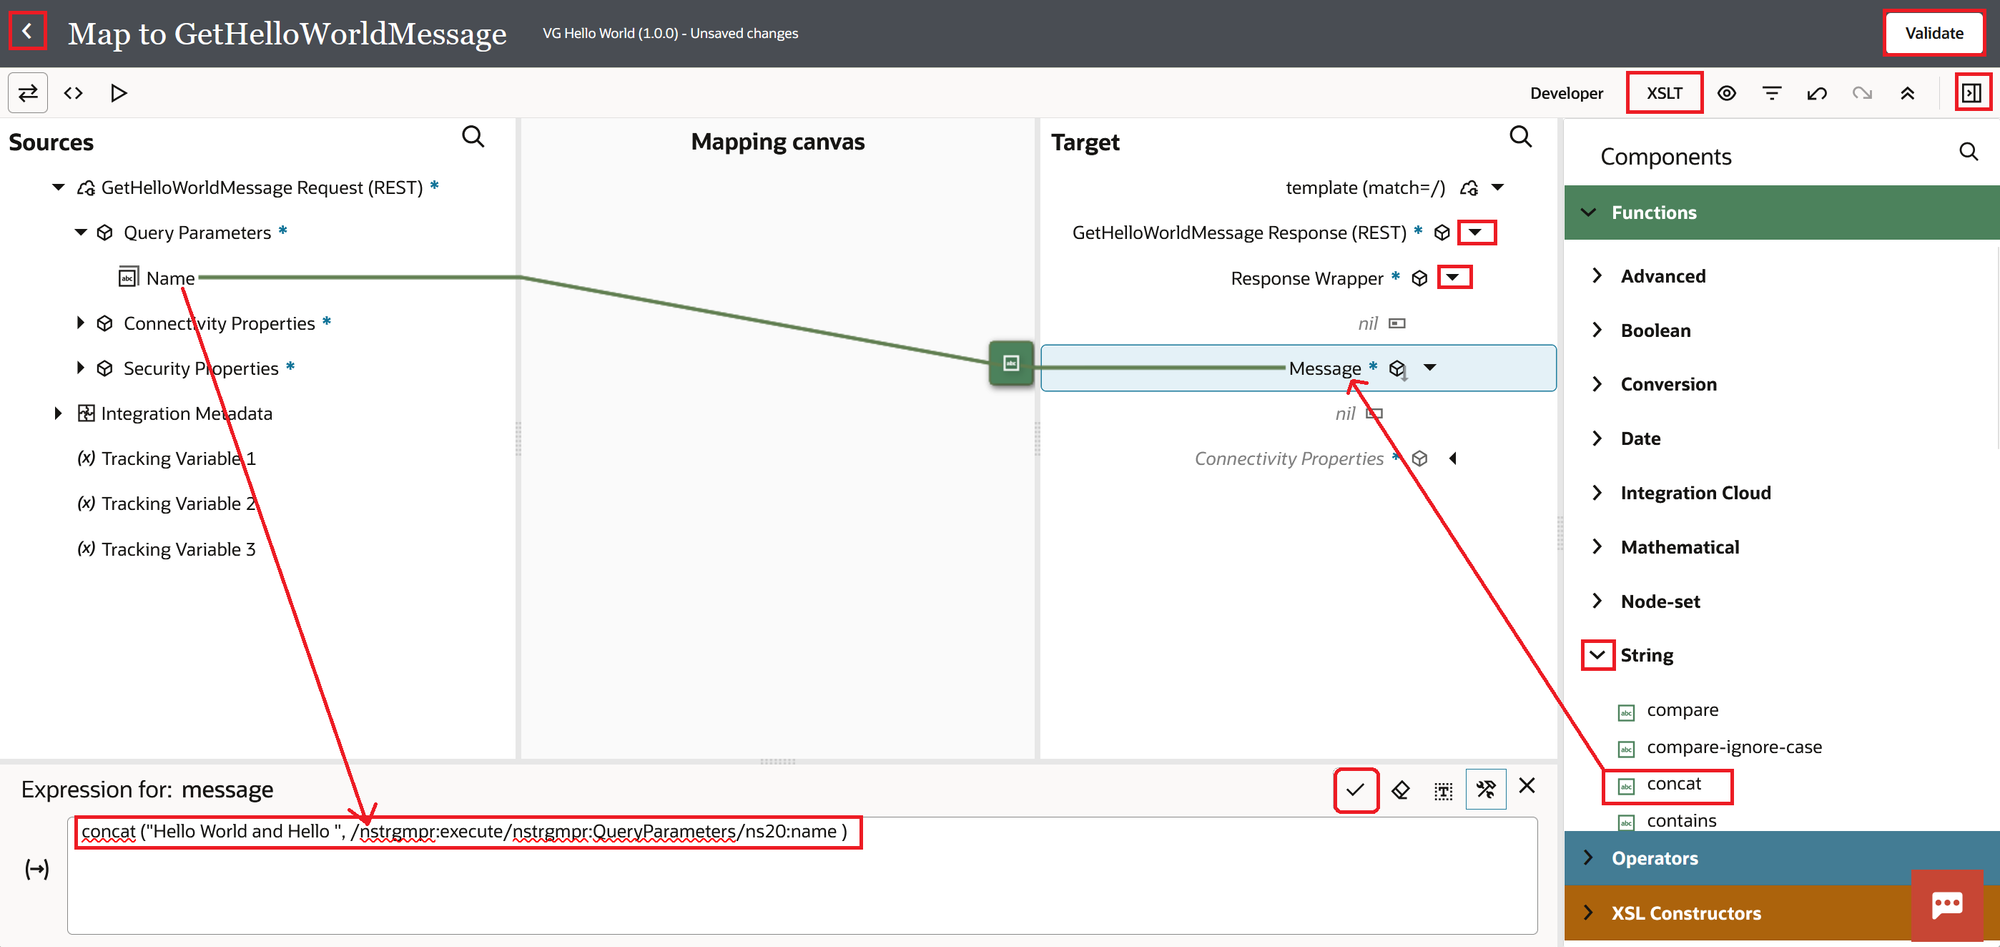
We will now map the source/input/request fields with target/output/response fields:
- Click on "XSLT" at the top right and click the expand icon next to it. This will open up all the XSLT functions which we can use in Source to Target Mapping
- Expand the target nodes on the right until you see "Message".
- Expand the "String" section under Components on the far right and drag the "concat" function onto the "Message" field.
- Enter "Hello World and Hello " to the left of the comma in the concat function.
- Drag and drop the "Name" query parameter from the Sources panel on the left into the concat function to the right of the comma.
- Click the Check icon, click Validate, and click the Back button.
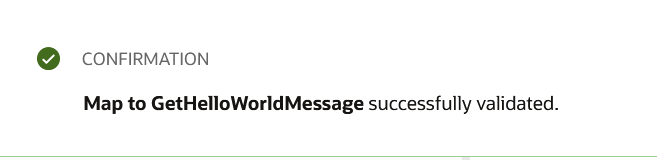
When you click the Validate button, you should see a confirmation message:
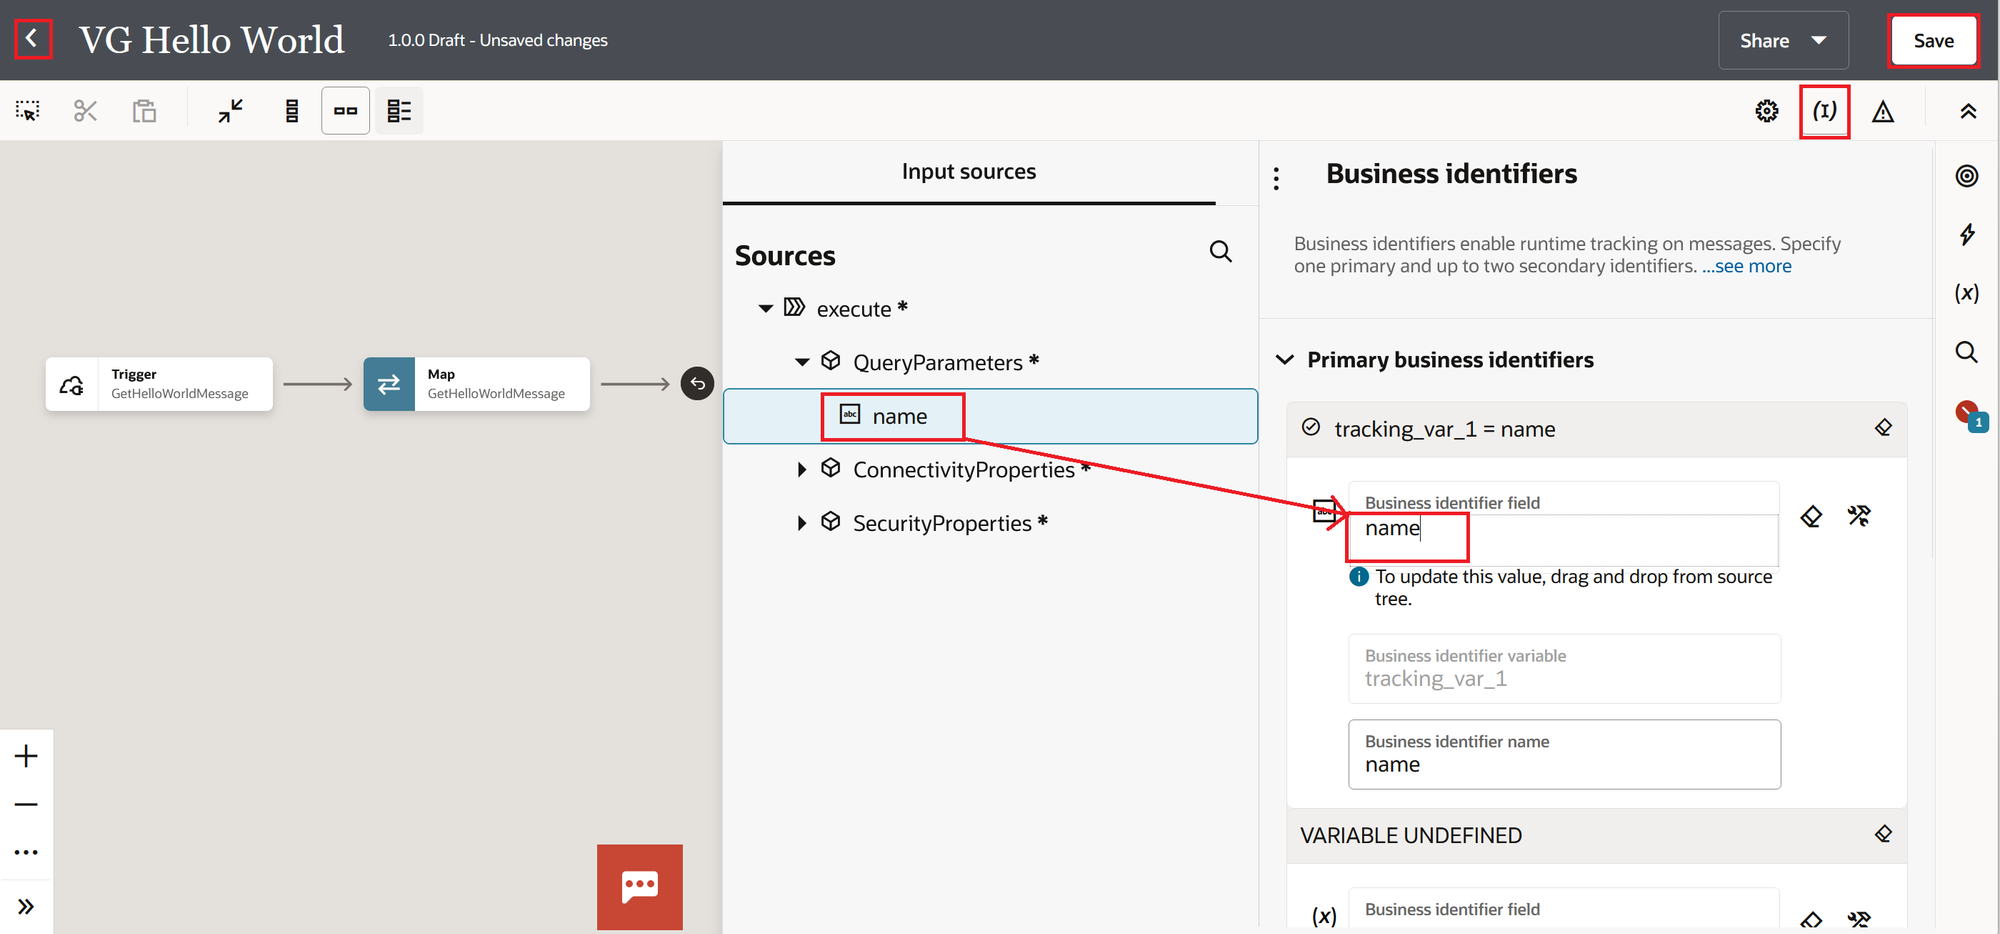
Step 5: Setting Up Business Identifiers
Business identifiers enable runtime tracking on messages. We use them to search and filter integration instances in the Observability section. Let us set up a business identifier using the "name" query parameter.
On the integration canvas, click the Business Identifiers icon (the one that looks like parentheses) on the top right toolbar. Drag the "name" field from the Sources panel and drop it onto the Business identifier field under Primary business identifiers. Click Save.
Note: You can define one primary and up to two secondary business identifiers. These are useful for searching integration instances later in the Observability section.
Step 6: Activating the Integration
Navigate back to the Integrations list. Locate VG Hello World and click the Activate (power) icon.

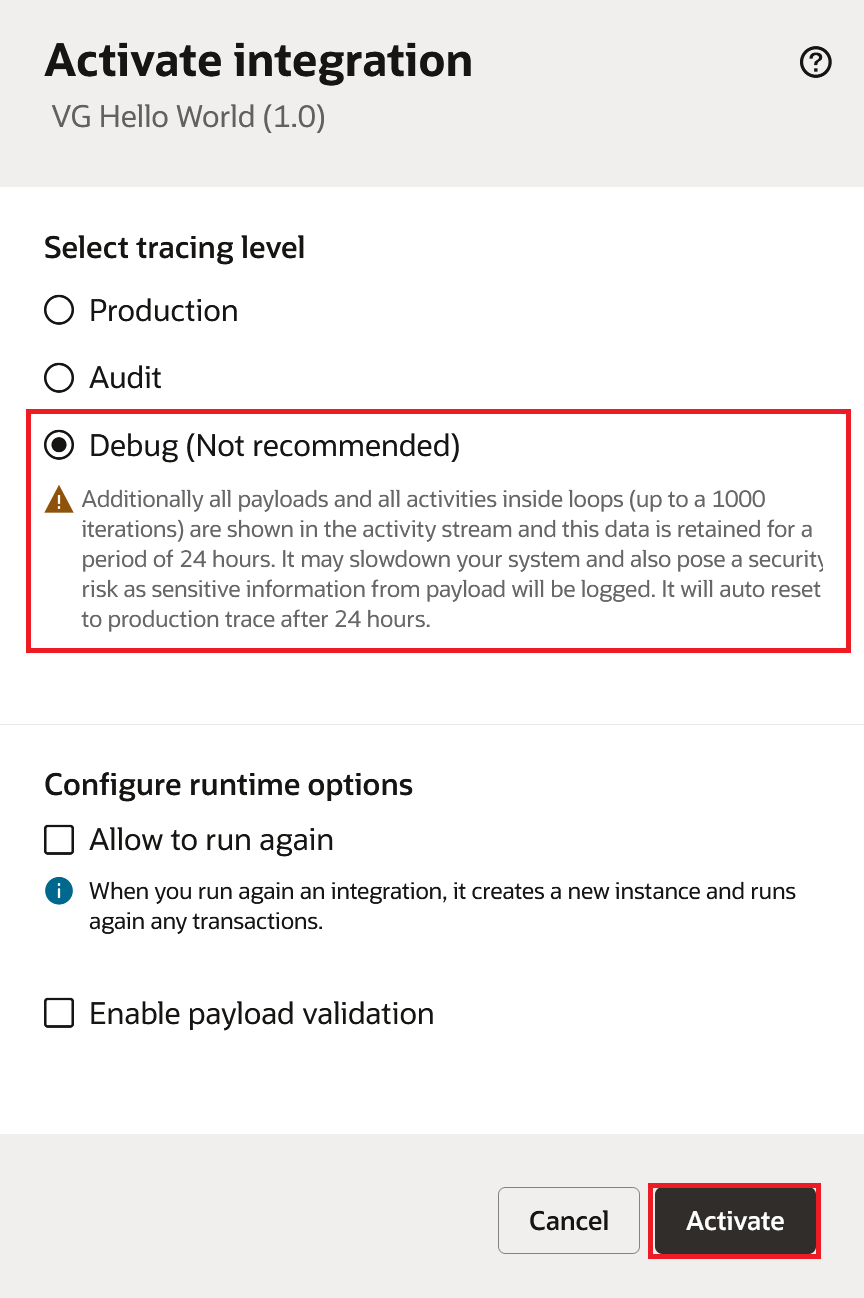
On the Activate integration dialog, select the tracing level as "Debug (Not recommended)" and click Activate.
Note: We select Debug tracing only for development and testing. It logs all payloads and activity details but auto resets to Production tracing after 24 hours. Do not use Debug in production environments because it slows down the system and logs sensitive payload data.
Refresh the Integrations page. The status of VG Hello World should now show "Active".

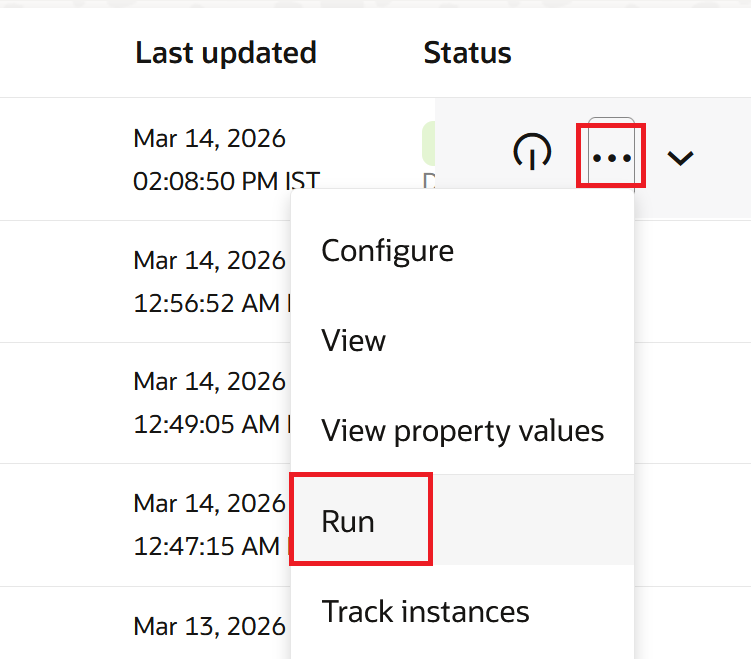
Step 7: Testing the Integration
Click the three dot menu next to the VG Hello World integration and select Run:
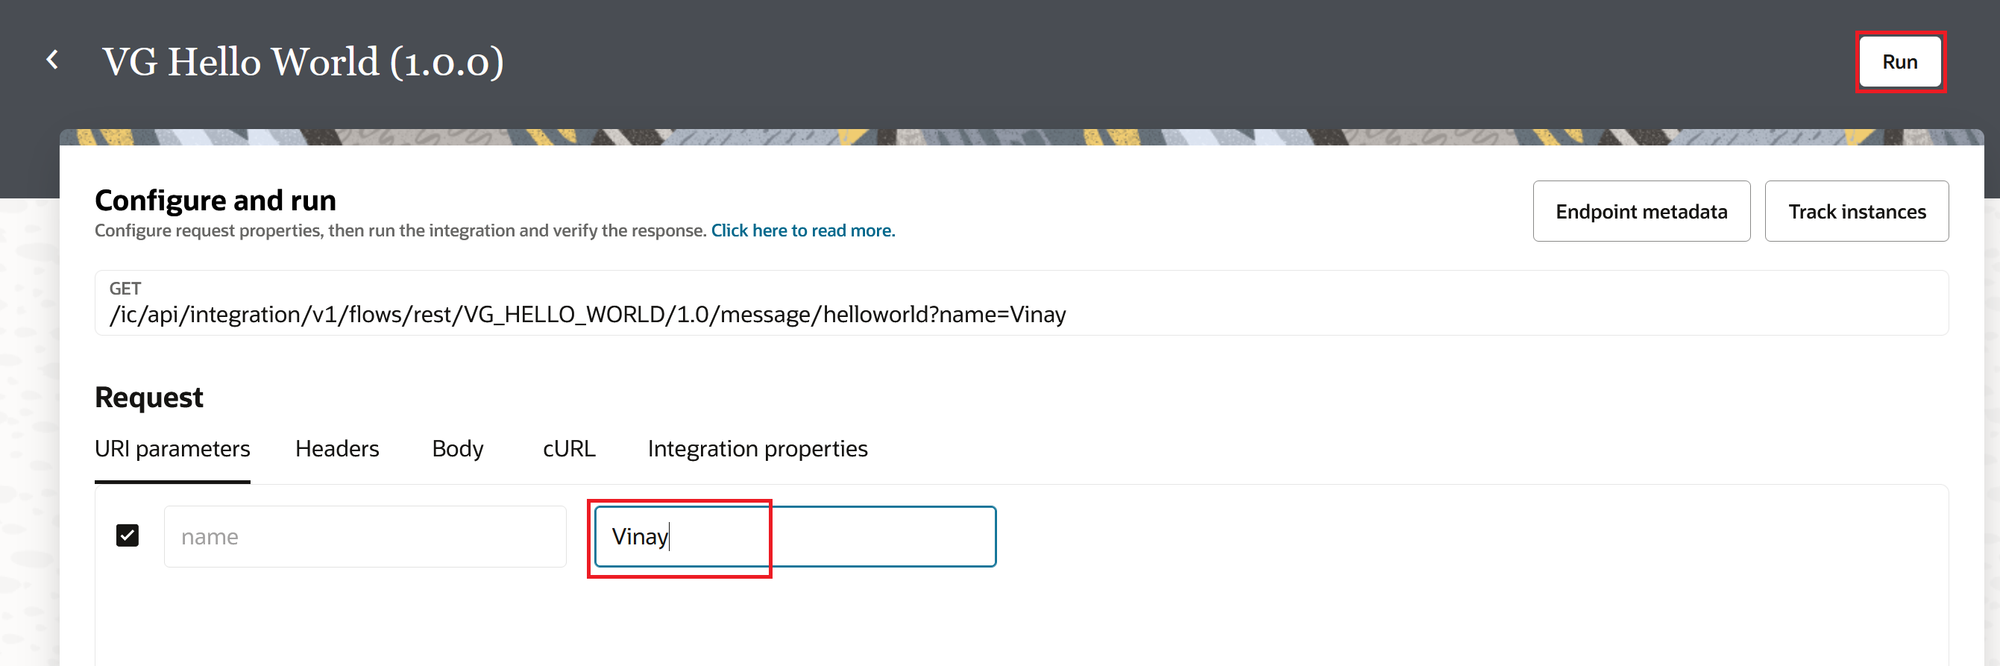
On the Configure and run page, enter "Vinay" as the value for the "name" URI parameter. Click the Run button.
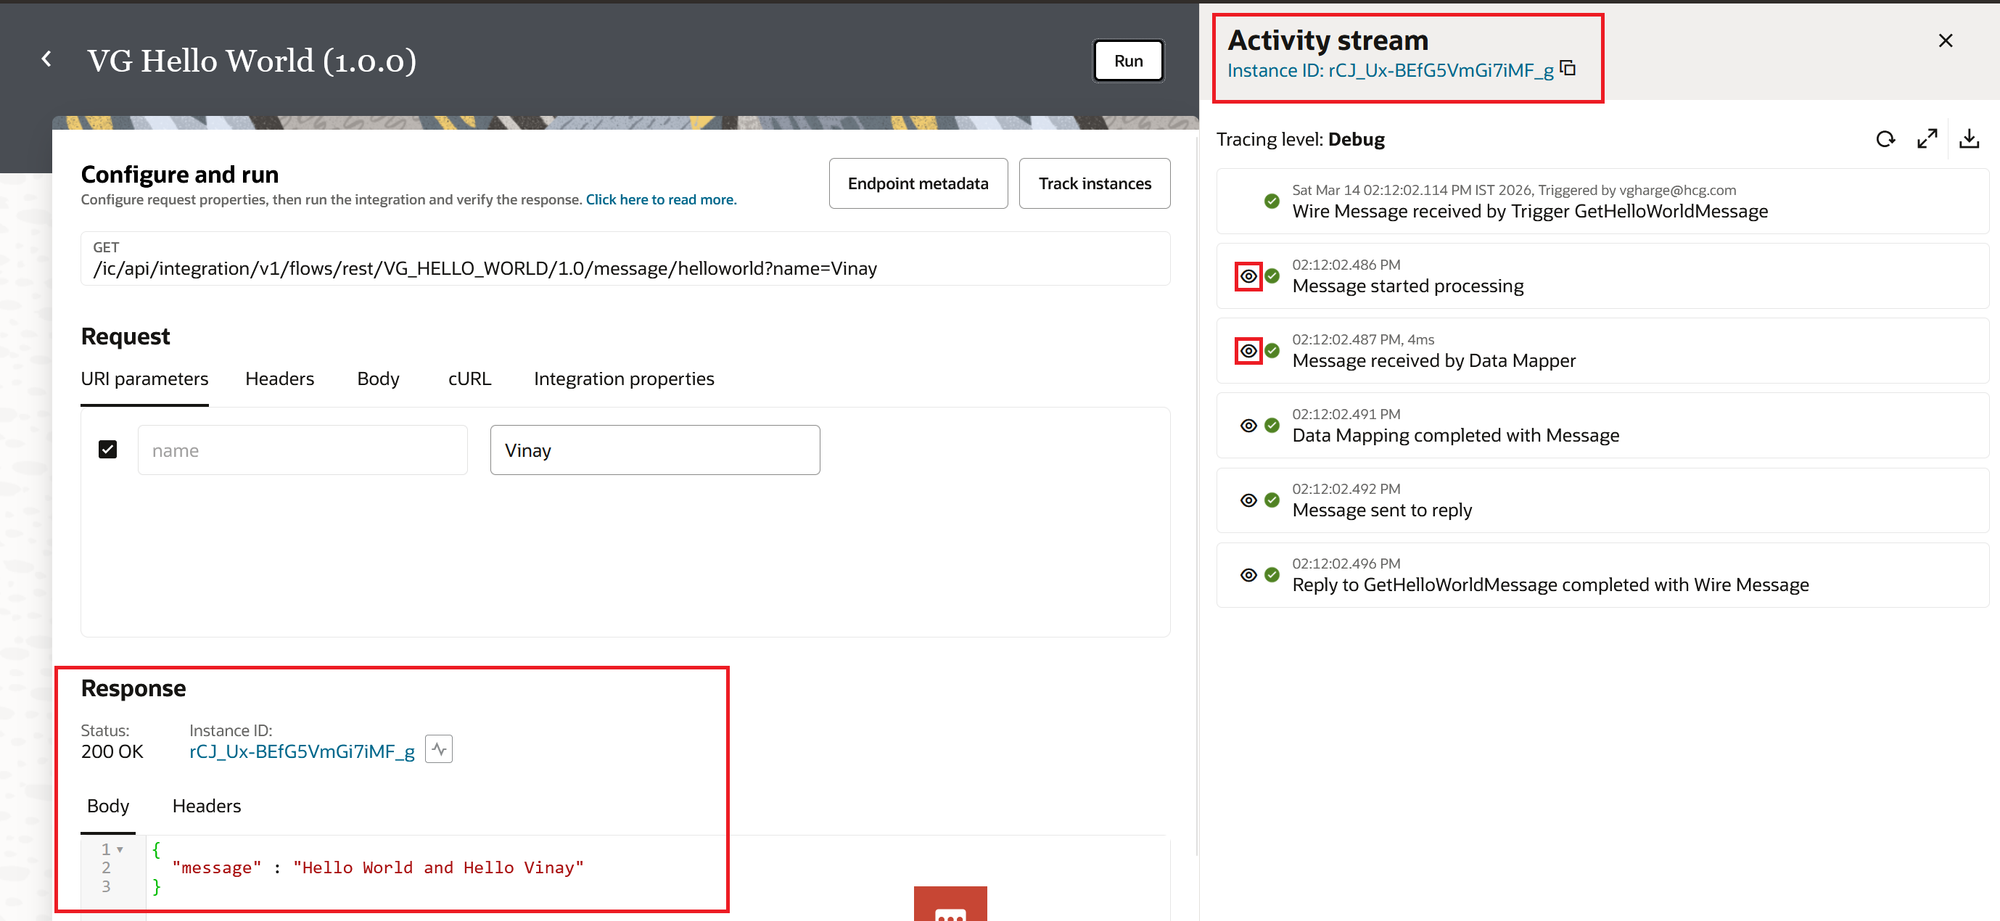
The Response section at the bottom left shows a 200 OK status with Instance ID rCJ_Ux-BEfG5VmGi7iMF_g. The JSON body reads {"message": "Hello World and Hello Vinay"}. This confirms our integration picks up the request parameter and concatenates it into the response message as expected.
The Activity stream panel at the top right displays the same Instance ID. The tracing level is set to Debug. We can see the full execution flow from the trigger receiving the wire message all the way through to the reply completing. The entire execution finishes in milliseconds.
Closing Thoughts
So, we have got a functional "Hello World" integration up and running in OIC Gen3. We walked through the process of creating a REST Trigger connection, then built an App Driven Orchestration integration. Next, we configured a GET endpoint, complete with a query parameter. We mapped the input to a response using the concat function, established business identifiers for tracking purposes, and finally, we activated and tested the integration.
This is the foundation for every integration you will build in OIC Gen3. The patterns we used here, creating connections, configuring triggers, mapping data, and activating with the right tracing level, apply to every real world scenario.